
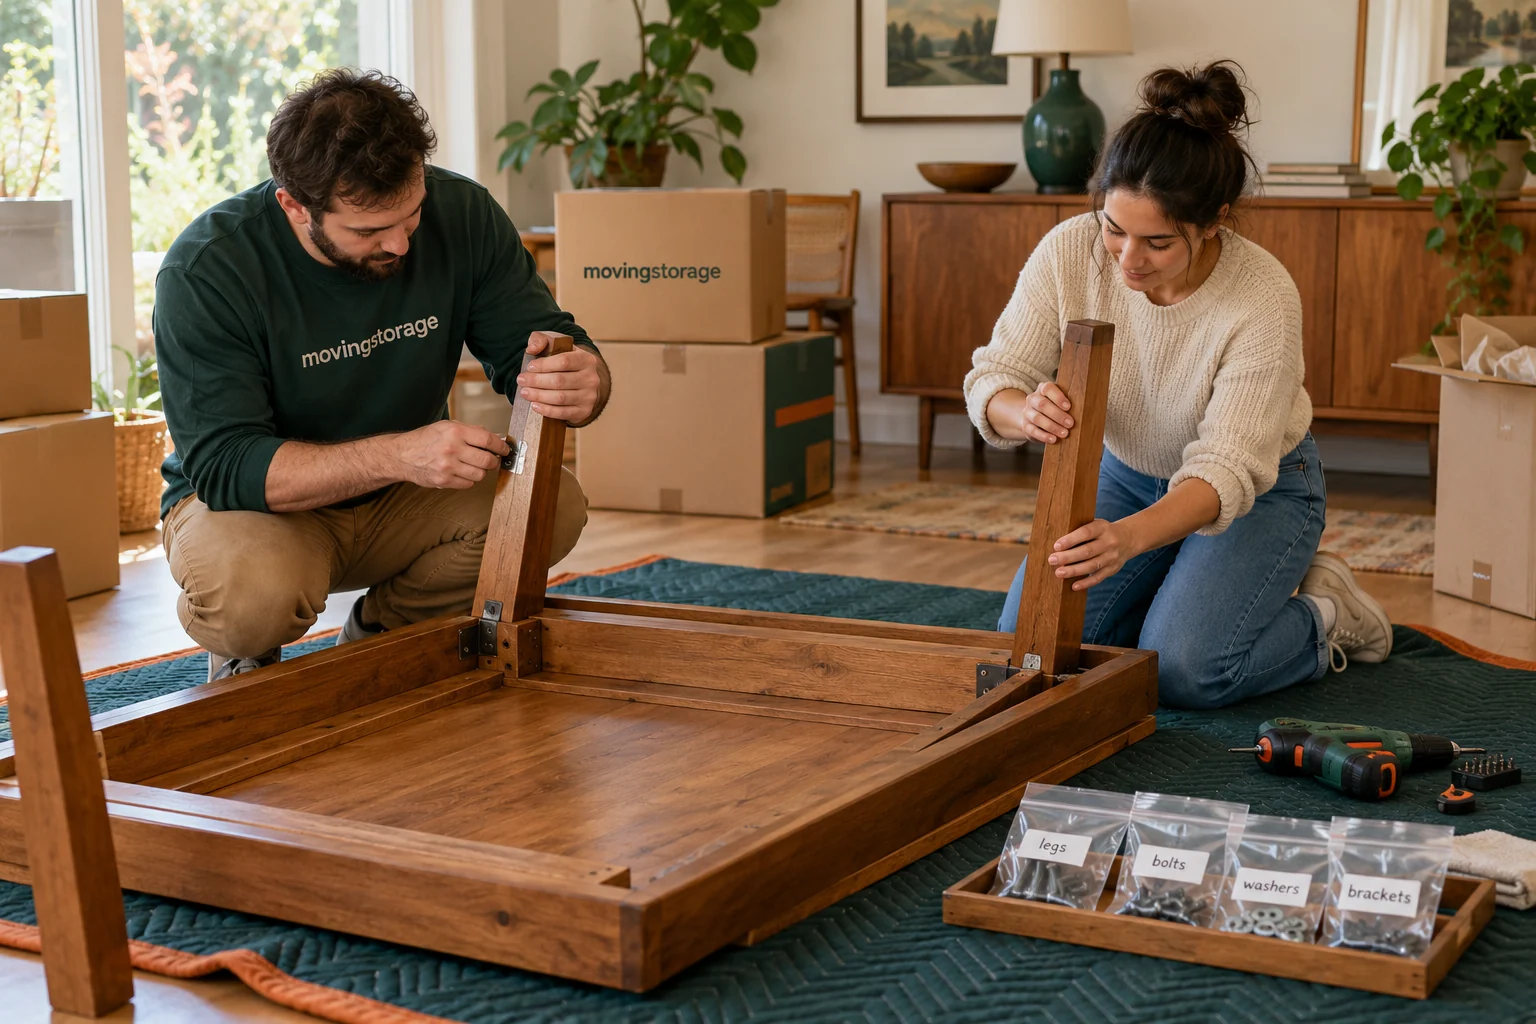
Furniture preparation starts with three decisions: whether the piece is going, whether it fits the planned route, and who will prepare it for transport. Wrapping comes after those decisions. A fully protected cabinet that cannot pass through the doorway still creates a problem, and a dismantled bed without identified fittings is not ready to rebuild. Give each large piece a clear plan before the room fills with cartons and the access route becomes difficult to inspect.
Walk through the home with a short furniture list. Record the destination room, overall dimensions, visible condition, and any preparation that appears necessary. Include removable shelves, doors, cushions, extension leaves, and other parts that belong to the piece. Check manufacturer instructions where available. If the construction is unfamiliar or the piece is damaged, valuable, heavy, or difficult to handle, arrange appropriate help rather than learning how it comes apart on the morning of pickup.
Decide what fits the destination
Measure the intended space at the new home using the whole footprint of the furniture. Include doors opening, drawers extending, chairs being pulled out, or another part moving in normal use. A table that fits into the room can still leave no practical route around it. Note sockets, radiators, steps, fixed cupboards, and other features that affect placement. The decision should reflect how you will use the space, rather than only whether the object can be placed inside its walls.
Compare the measurements with the route into the property. Record doorway clearances, stair turns, landings, lift dimensions, and any restriction on using shared spaces. Share the details and photographs with the moving provider before pickup. Do not assume that the crew will discover a workable method because the furniture once entered your current home. The new property may have different access, and a protected or dismantled piece may have a different shape from the one you measured in the room.
If an item does not appear to fit, ask the appropriate professional about the options before making irreversible changes. Removing a door, taking off a fixture, using specialist access, or modifying furniture can involve permissions and skills outside an ordinary transport service. Get the responsibilities and arrangements clear. Your large-furniture fit checks can organise the measurements, but a difficult handling method still needs to be agreed with the people carrying it out.
Record the condition while surfaces are visible
Photograph the whole piece and any existing marks, repairs, loose joints, worn edges, or damaged fittings. Use enough light to show what you are recording without relying on a single distant room photograph. Add a short description of the location, such as “scratch on right side below top drawer.” Keep the record linked to the furniture item number. These notes help you remember its condition and discuss concerns without relying on a broad description such as “used cabinet.”
Check parts that may not be visible after wrapping. A table underside, rear panel, mirror fitting, or bed connection can matter to preparation and later assembly. Do not disturb a structural part just to take a photograph if you do not know how it is supported. Ask the person doing the dismantling to record the relevant details as part of the work. The condition record should support the preparation plan, rather than creating a separate risk through unnecessary handling.
Review any inventory prepared by the provider and raise questions about descriptions or condition notes before accepting them. Your own photographs do not replace that process or the written service terms. Keep documents together so the furniture name in your notes matches the item identified by the mover. If several similar pieces are moving, distinguish them clearly. A pair of matching bedside cabinets still needs separate identification when one has an existing loose handle and the other does not.
Empty furniture under the agreed method
Ask the provider what must be removed from drawers, shelves, and cupboards before transport. Do not assume that a dresser or filing cabinet can travel with everything inside. The answer may depend on the furniture, contents, access, and handling arrangements. Pack the removed contents into suitable containers and label them for their destination. An emptied piece should not become a last-minute place to hide loose items after the packing cartons are closed.
Keep private papers, valuables, medication, and other personal essentials outside the furniture preparation flow. Check drawers carefully before they are removed, secured, or wrapped. Look behind removable trays and in compartments that are rarely used, without forcing parts you do not understand. A small item left inside can become difficult to find or create noise and movement during handling. Decide explicitly which pieces or fittings remain installed and record that arrangement.
Prepare glass shelves, display panels, and other fragile components under a method suited to the item. Confirm who removes them and how they will be packed and identified. Do not tuck an unprotected shelf into a general carton because it has become separated from the cabinet. Give the component an item reference that points back to the parent piece. The person assembling the furniture should be able to locate the correct shelf and supports without opening every fragile package.
Agree dismantling before the tools come out
Check whether dismantling and reassembly are included in the service scope. Ask what the provider considers routine work and what requires a separate appointment. Explain anything unusual about the furniture, including past repairs, missing instructions, fitted elements, or changes made since purchase. A crew expecting to move a complete table may not have allowed for a complicated dismantling task. Resolve the scope while there is time to obtain instructions, tools, or the right person.
Where you will dismantle an ordinary piece yourself, follow the manufacturer's instructions and stop if the work exceeds your ability or the item's condition makes it uncertain. Do not improvise structural changes or force a fitting simply because it resists removal. Some flat-pack furniture may not tolerate repeated dismantling as you expect. Get product-specific advice where needed and make a decision about transport based on the actual construction rather than a generic household tip.
Work on one piece at a time and keep its parts together. Photograph each useful stage and label matching components discreetly where it will not damage a finish. Record orientation or position when it matters. A row of similar bed slats or cabinet panels can be harder to reconstruct than it appears while the whole piece is standing. Keep the instructions accessible during the journey, along with the inventory and the details of whoever will carry out reassembly.
Give hardware a traceable home
Use a suitable closed container for fittings from each piece and label it immediately. Include the furniture item number and a brief description, such as “dining table legs.” If several types of fitting come from different stages, keep them identified separately within that group. Avoid a general jar containing every screw removed from the home. It may look tidy on the workbench, but it transfers the sorting task to a tired person trying to rebuild furniture after delivery.
Record where the hardware container travels. Depending on the agreed method, it may be protected with the furniture or kept in a clearly identified parts carton. Do not attach a heavy or sharp hardware bag where it can rub against a finished surface. Ask the provider what it prefers if the crew will handle assembly. Everyone needs to know how to locate the fittings without unwrapping unrelated pieces or opening private household bags.
Keep essential tools available without leaving them loose in the furniture packaging. If you need tools at both addresses, make a short tool list and decide who carries them. Include only work you are competent and permitted to do. A missing correct tool can delay assembly, but using an unsuitable tool can damage a fitting or create another problem. Where the service supplies the tools, do not duplicate or alter the crew's preparation without discussing it first.
Protect the finish with suitable materials
Identify the surfaces you need to protect: polished wood, veneer, upholstery, leather, metal, glass, paint, or another finish. Choose clean materials appropriate to those surfaces and the expected journey or storage period. Do not assume a soft-looking blanket is clean, dry, or free of hard debris. Inspect reused protection before placing it against furniture. Where an item's finish is delicate, recently treated, valuable, or uncertain, ask the manufacturer or an appropriate specialist what may touch it.
Avoid putting tape directly on a finished surface. Secure protective materials using a method that suits the item and does not create pressure on fragile details or moving parts. Keep handles, legs, corners, and projecting fittings in mind when building the protective arrangement. A smooth top surface may look well covered while a vulnerable leg remains exposed beneath it. Confirm how the furniture will be held and moved so the protection does not hide or obstruct necessary handling points.
Do not seal an item away while it is damp from cleaning or another source. Plan cleaning early enough for the product and furniture to be ready under the relevant care instructions. Use only appropriate cleaning methods; the move is not a reason to apply a new treatment to an unfamiliar finish. If there is evidence of mould, pests, or another condition that needs attention, address that issue separately before packing it with the rest of the household.
Label components for the destination
Give every separately packed component the parent furniture reference and destination room. A carton labelled “glass shelf for cabinet F04” is easier to place and rebuild than a plain fragile carton among many others. Record the number of component packages so you can check the group at delivery. Do not assume parts will remain beside the main piece throughout the journey. Handling and loading can separate them even when they were standing together at pickup.
If furniture is being split between storage and the new home, make the destination distinction explicit. Ask whether the provider needs a particular loading order and keep the holding areas separate where practical. Your furniture storage preparation should cover the expected storage period and conditions as well as the first trip. A package prepared for immediate use may need further consideration if it will remain unopened for much longer than planned.
Write any agreed instructions so the next person can understand them. Avoid private shorthand such as “same as upstairs” or “put with the other one.” The label should identify the piece without requiring a tour of the old home. Keep sensitive or detailed values in the private inventory. The outside of the package needs to communicate destination and handling information, while the fuller record can describe ownership, condition, component counts, and relevant documents.
Prepare the route for pickup
Clear the agreed access route before the handling work begins. Remove loose cartons, rugs that present a problem, small furniture, and anything else the provider has asked you to move. Keep doorways usable and tell the household which areas need to remain clear. Do not start carrying a large piece while someone else is still deciding where the packing table should stand. The route should be ready before the furniture leaves its stable position.
Discuss building protection and access restrictions with the provider or building manager as appropriate. Confirm elevator reservations, loading arrangements, and any limitations on common areas. Do not cover floors or stairs with improvised materials that the crew has not agreed are suitable. A covering intended to protect a surface can affect footing or access if it is poorly chosen. Ask what the responsible people will supply and which tasks you need to finish before they arrive.
Point out prepared furniture and unresolved questions during the pickup walkthrough. Refer to the written arrangements for unusual pieces rather than relying on a last verbal request. If the crew identifies a preparation problem, pause that item's handling and agree the next step. Do not let an unsafe or unsuitable method proceed just to preserve the schedule. Record any change in scope or preparation through the provider's normal process before the item is loaded.
Rebuild only when the new room is ready
Confirm the planned position before furniture is unwrapped or assembled. Check the floor area, access around it, and any work still happening in the room. Follow the product's assembly and anchoring instructions, and use appropriate qualified help where required. A wardrobe or bookcase is not ready for loading with belongings simply because its panels have been connected. Complete the installation work that applies to that product and location before using it.
Compare component packages with your record, check condition, and keep fittings accounted for as assembly proceeds. Record concerns promptly and follow the provider's written process where applicable. Keep protective materials and hardware packaging until you know the piece is complete and any relevant concern has been addressed. Finish by noting what remains unassembled and who will complete it. That turns a collection of protected parts back into furniture the household can use.
Give delayed pieces a temporary location that does not block daily life. Record whether each awaits a missing fitting, a service appointment, a final room decision, or further advice about its condition. Keep its instructions and parts together until the task is closed. This final record is especially useful when several pieces are unfinished for different reasons. It prevents the household from repeatedly moving the same panels while nobody knows what is needed to complete them.